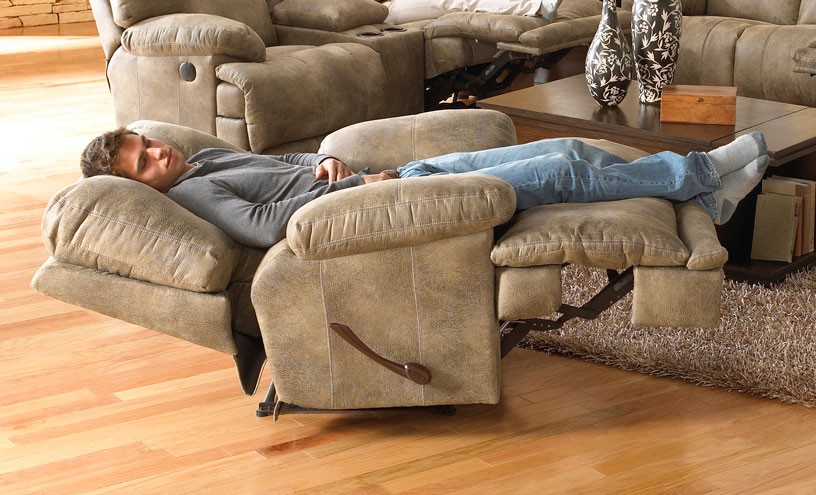


The manufacturing process for most recliners Trusted Source Recliner - Wikipedia A recliner is an armchair or sofa that reclines when the occupant lowers the chair’s back and raises its front. It has a backrest that can be tilted back, and often a footrest that may be extended by means of a lever on the side of the chair, or may extend automatically when the back is reclined. en.wikipedia.org is standardized, meaning they will likely have the same pitch and tension alongside other similar characteristics. However, for the people receiving the seats, this is not a good thing. After all, the seats do not cater to their individual needs.
Nevertheless, the seats are adjustable for people with the right knowledge. Consequently, we elaborate on how to adjust a recliner in the sections below. That way, you can tweak its tension and pitch settings to match your body type and comfort needs.
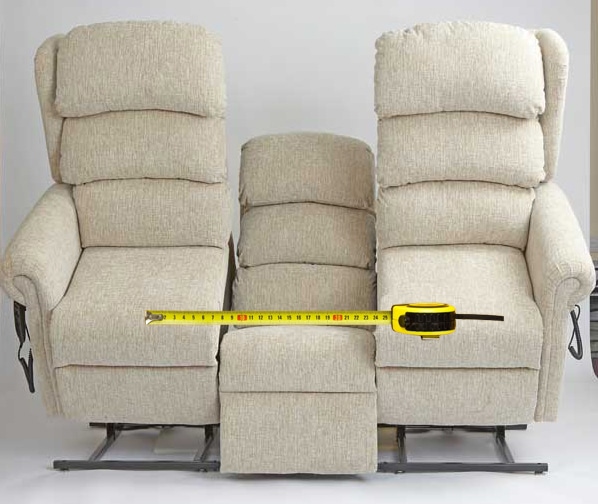
The recliner tension is one of the first things you notice about your new seat. It refers to how hard or easy it is to recline the chair. Of course, this will be different for everyone who sits on the recliner. For instance, if you’re heavy-set, you might feel the tension is too little. Speaking of heavier, taller people, the Lane Home Furnishings Wallsaver comes highly recommended by previous users as a great recliner seat option. It handles up to 500 lbs weight thanks to the 7-gauge steel construction and even features the length of a king-size bed.
If a person with a much lighter body frame tries the same chair, they will likely feel the tension is too much. Nevertheless, you can only test this once the recliner is safely in your house. You do this by sitting in the chair and trying to recline. If it’s too strenuous to recline the chair, the tension is too high and consequently needs to be reduced. If, on the other hand, the chair reclines too easily, then that needs correcting as well.
After you’ve determined that a change is needed, you change the tension by following the steps below.
You start by flipping the chair upside down to expose the underside. First, you ensure the chair is in its most basic configuration. This is where you put the backrest in its upright position. The footrest also needs to be closed. Tilt the chair forward until the top of the backrest, and the front edges of the armrests are touching the floor.
Some recliners are quite heavy; hence it might help to have a second pair of hands helping. However, if you’re confident you can do it without dropping or damaging the chair, you don’t need a helper.
Next, you locate the tension adjustment mechanisms on the bottom side of the recliner. Since it’s now up in the air, these mechanisms should be easy to spot. They are either in the form of thumbwheels or wing nuts. If none of these is available, then you can’t adjust the recliner’s tension.
Notably, the placement and orientation of these components will vary depending on the manufacturer and the chair model. However, it’s relatively common for them to be near the back of the seat on the bottom side of the recliner. Another typical configuration situates them in the bottom center.
You can tell them apart from other inclusions at the bottom of the seat by the fact that they’re attached to a bolt. Additionally, the other side of the bolt should be connected to tension springs.
Turn these wing nuts or thumb wheels to adjust the tension. For most models, you increase the tension by turning them clockwise. Of course, if you do the opposite and turn them anticlockwise, you’re decreasing the tension.
Remember to make the adjustments in the same direction for both sides of the chair. Use quarter turns for each nut or wheel, then make the same adjustment on the other side to keep changes uniform. Sometimes it’s too hard to turn these components using your fingers, in which case you can opt to use pliers.
Once you’ve made sufficient adjustments, you enter the testing phase. This is where you put the chair back in its upright position, sit on it, and then try the recliner function. Admittedly, you’re adjustments may overshoot to the other extreme end. For instance, where you felt the tension was previously too little, it may now be too much or vice versa.
Alternatively, you may have fallen shy of the mark with your adjustments. In these cases, you repeat the steps above and make further adjustments. However, if the tension feels just right, you’ve concluded the necessary steps for how to adjust the tension on a flexsteel recliner.
Loosening or tightening these adjustment mechanisms all the way is a bad idea. It even has the potential to damage the tension spring permanently. Additionally, any free movement in the tension spring is a sign that it’s too loose and should be corrected. Lastly, one way to avoid the hassle of adjusting the tension every now and then is to get an electric recliner where you make adjustments via remote control. That way, you won’t need to push back the backrest with your strength and therefore don’t need to worry about tension.
According to reviewers, the CANMOV Power Lift Recliner is an excellent electric recliner option. You use the remote provided to change the recliner level, and the interior motor will do the rest. Also, since it’s a power-lift chair, the motor can even push the chair up to allow you an easier time standing up.
Of course, if you use the recliner for long enough, there will be changes in the tension due to old age and deterioration of the tension springs. As such, how to adjust such a rocker recliner requires that you replace old springs with new ones. Here are the steps to follow:
Start by acquiring the right replacement springs for your type of recliner. Ideally, you should get the replacements from the same manufacturer who made your recliner. This is an easy way to guarantee compatibility with the new parts. These parts are likely available at your local recliner retailer or online.
If you don’t find any, you can contact the manufacturer and ask for advice on finding compatible springs for your chair model. Try to check for heavy-duty construction to ensure the longevity of the chair.
Just like with the first process, you need to flip the recliner over. You raise the backrest to its highest position and push the footrest back down before flipping the chair over slowly and carefully. There should be springs where one end is attached to clips or tabs on the bottom of the chair, and the other end is attached to the chair’s frame.
Once you’ve located the old/damaged springs, you remove them from the chair. Notably, this isn’t a job for your bare hands, and you should use a pair of pliers. Grab onto one end with your pliers. Preferably, this is the end attached to the clips or tabs. Twist it loose and disconnect it from the chair.
After that disconnecting the other end is easy and can be done with your free hands. It’s also wise to wear protective gear and to exercise extreme caution while removing the spring. After all, the unreleased tension might make it harder to control, which can lead to injuries.
Next, you stretch the new springs so they’ll be easier to fit into the chair. You will need two screwdrivers and a few coins for this step in the process. Use the screwdrivers to pry open the loops on both ends of the spring. To do this, you slide the sharp end of the screwdriver through the small space between the first and second loop in the spring.
This gives you leverage to then stretch the spring by pulling the screwdrivers apart. After that, slide coins in between the other loops to keep them separated. You can also substitute the coins with washers or any strong material small enough to fit between the loops.
This is where you attach the spring to the chair. It should be a simple enough matter to slide one end of the spring into the appropriate hole in the recliner’s frame. However, after that, you’ll need your pliers. Use the pliers to hold the other end of the spring as you gently pull it towards and try to attach it to the clips/tabs.
Again, extreme caution is advised since springs under tension can be dangerous. It’s even better if you can lock your pliers to ensure a better grip.
Once you’ve ascertained the spring is in the right position and attached to the recliner, you then move to remove your coins. After that, the spring should revert to the normal tension. The last step is to return the chair to an upright position and test the reclining experience. You can always try an alternative set of springs if the ones you installed aren’t giving you the best results.
Another aspect that can make recliner use uncomfortable is the pitch of the chair. The recliner pitch describes the position of the chair front while the backrest is at its base position and the footrest is closed. Of course, to test whether the pitch is right, you need to sit on the chair. Once there, if your feet can’t touch the floor underneath, then the pitch is too high.
Conversely, if the knees bend upward and are somewhat raised above the seat, the pitch is too low. In both scenarios the pitch needs to be corrected, and we have a guide to help with that.
Expose the underside of the power recliner, push-back, wall-hugger, or another type of recliner by tilting the chair forward until it’s supported by the top of the backrest and the front of the armrests. The backrest should be at the highest position, while the footrest should be closed while you’re doing this.
Find the cam bolts. Typically you’ll find them near the recliner’s center-bottom area, although it’s also feasible that they might be elsewhere. They should be in the chair’s metal frame, which helps differentiate them from recliner tension bolts connected to springs. Also, there are four cam bolts distributed near the back and front of the chair.
Loosen the back cam bolts using a wrench just enough so they’re still attached to the frame while allowing the chair to wiggle. As for the front cam bolts, you can remove and store them safely.
Follow up by adjusting the frame up or down depending on your needs. If you slide it up and back, the front of the chair will move closer to the floor. Alternatively, if you move the frame downwards and forward, you increase the rear pitch, thereby raising the front side of the chair further from the floor.
Additionally, the area where you removed the front cam bolts also allows you to make adjustments. In most recliner models, you’ll find two sets of holes for the bolts. This is in addition to the grooves that allow up to five different settings. As such, you can make adjustments by switching the holes and selecting the grooves you want.
Despite looking small, changing these settings can have a considerable impact on the pitch. As such, it’s better to make smaller adjustments while testing the recliner to ensure you don’t go overboard.
Next, you re-insert the front bolts and tighten them with a wrench as required. The back bolts also need to be re-tightened. A final check before you turn the chair over is to try and wiggle it. If it wiggles, you still have some tightening to do. If not, you’re almost done with adjusting your recliner.
Return the chair to an upright position for testing. If your feet touch the floor all while the knees maintain a right angle you’re good to go. If not, repeat and re-adjust as needed.
If the footrest isn’t responding when you use the trigger release latch on your recliner, then you need to replace the recliner cable. As such, you can contact the manufacturer or other recliner vendors for an extra cable before you go to work.
After that, remove the trigger release latch. This requires you to unscrew it from your recliner using a screwdriver. Next, pull it from the chair to expose the cable. Follow up by tipping the recliner over to expose the underside. This is where the other end of the cable is connected.
The footrest needs to be closed and the backrest at the highest position. Use pliers to pinch a plastic clip attaching the cable to the chair. Of course, pinching this clip releases the cable.
While the chair is still in the upside-down position, release the footrest by flipping over the mechanism arm while tugging lightly at the cable. This exposes the release arm where the cable is still attached to the chair.
Lift this release arm and unhook the cable to detach it completely from the chair. You can then free the cable by pulling it out through the hole on the side of the chair. After that, take the replacement cable and push it through the same holes that the previous cable went through. Start with the one on the side of the chair. Notably, replacement cables should come attached to a trigger release latch as well.
Insert the new plastic clip into the respective hole until it clicks into place. After that, lift the release arm and hook the new cable into the same hole that you unhooked the old one. In most recliners, there are multiple holes in the release arm. Changing to a different one will then change the tension of the cable and the responsiveness of the release latch.
After that, close the footrest and return the recliner to an upright position. This leaves you to screw the new trigger release latch onto the chair. Once you complete that, you’re done and can test to see if the new cable works.
Fixing the recliner footrest could be another major undertaking depending on the problem. However, our team has already tackled this problem in a different write-up linked here.
If there’s no apparent damage to the chair, the solution is as simple as flipping the chair over and tightening some loose bolts. Just try tightening the bolts with a wrench, and the loose ones will reveal themselves.
Now that you know how to adjust a recliner, problems with chair tension and pitch should be a thing of the past. You just need a few inexpensive tools and the right spares in some instances. After that, you can open up this guide and follow the step by step instructions. All the best as you work on your recliner.


